Getting Started with Navigation (If equipped)
Precautions for Safe driving
Navigation use restrictions
Please observe and comply with local traffic rules and regulations.
- For your safety, some features cannot be operated while driving. Features that cannot be operated on will be disabled.
- The route displayed for destination guidance is a reference and the route guidance will take you to the vicinity of your destination. The highlighted route is not always the shortest distance, the least congested, and in some cases might not be the fastest route.
- Road, name and POI information may not always be completely updated. Some places may not include up to date information.
- The car position mark does not always indicate your exact location. This system uses GPS information, various sensors, and road map data to display the current position. However, errors in displaying your location may occur if the satellite is transmitting inaccurate signals or two or fewer satellite signals are being received. Errors that occur in such conditions cannot be corrected.
- The position of the vehicle within the navigation may differ from your actual location depending on various reasons, including the satellite transmission state, vehicle state (driving location and conditions), etc. Additionally, the car position mark may differ from the actual position if the map data is different from the actual road landscape, such as changes due to the construction of new roads. If such differences occur, driving for a short period of time will automatically correct the position of the vehicle through map matching or GPS information.
What is GNSS?
The GNSS (Global Navigation Satellite System) is a satellite-based navigation system made up of a network of 24 satellites placed into orbit by the U.S. Department of Defense.
GPS was originally intended for military applications, but in the 1980s, the government made the system available for civilian use.
GPS works in any weather conditions, anywhere in the world, 24 hours a day.
There are no subscription fees or setup charges to use GPS.
About satellite signals
Your unit must acquire a satellite signal to operate. If you are indoors, near tall buildings or trees, or in a parking garage, the unit cannot acquire a satellite signal.
Acquiring satellite signals
Before the unit can determine your current position and navigate a route, you must do the following steps:
- Go outside to an area free from tall obstructions.
- Turn on the unit. Acquiring satellite signals can take a few minutes.
Operating Navigation Screen
|
|
|
|
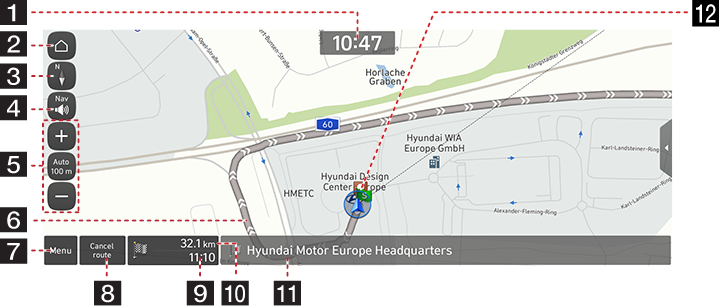
1 Clock display
Displays the current time.
2 Home button
Moves to the [Home] menu screen.
3 Map view button
Changes the map view perspective. Press [![]() ], [
], [![]() ] or [
] or [![]() ].
].
-
 (2D heading up): The map always displays the vehicle’s direction as proceeding towards the top of the screen.
 -
 (2D north up): The map always points north, regardless of the direction that the vehicle is moving.
 -
 (3D heading up): The map always displays the basic outline and details of the surrounding roads and general area.
4 Navigation volume button
Adjusts the navigation volume. For more details refer to the “Navigation volume” part.
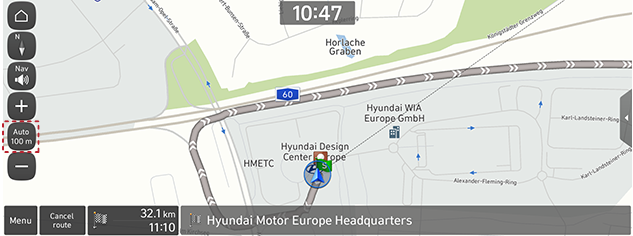
5 Map scale
Displays the current map scale.
- Press the Autoscale button on to adjust the map scale automatically depending on the speed.
- Press the Autoscale button again to adjust the map scale manually.
+/- (If equipped)
Press [+/-] to set the zoom level on the map screen.
6 Route guidance lane
Displays the route guidance to the destination when a route is set.
7 Quick menu pop-up button
The quick menu is displayed. For more details refer to the “Quick menu” part.
8 Cancel route (If equipped)
Cancels the route guidance.
Stop guidance/Resume guidance (If equipped)
Stops or resumes the route guidance.
9 Arrival time or remaining time display
Displays the expected time of arrival or remaining time. Press to check the destination information.
10 Remaining distance display
Displays the remaining distance to the destination. Press to check the destination information.
11 Current location and destination display
Displays current location and destination.
12 Vehicle position mark
Displays current vehicle position and direction.
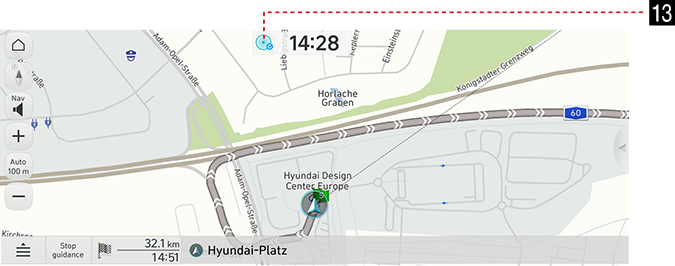
13 DTE button (EV vehicle only)
Shows drivable circular distance.
|
,Note |
|
The drivable distance may differ from the actual distance. |
Zoom In/Zoom Out
- Pinch in/out to set the zoom level on the map screen.
- Turn the controller left/right to set the zoom level on the map screen. (If equipped)
- Press [+/-] to set the zoom level on the map screen. (If equipped)
Map scale
This function sets the zoom level automatically according to the speed.
Press [![]() ]/[
]/[![]() ] on the map screen.
] on the map screen.
|
|
|
Name |
Description |
|
Scale Fix [ |
Fixes the displayed scale. |
|
Auto Scale [ |
Map scale is set automatically according to the speed, road class and guidance distance. |
Press [![]() ] or [
] or [![]() ] to adjust the volume.
] to adjust the volume.
|
|
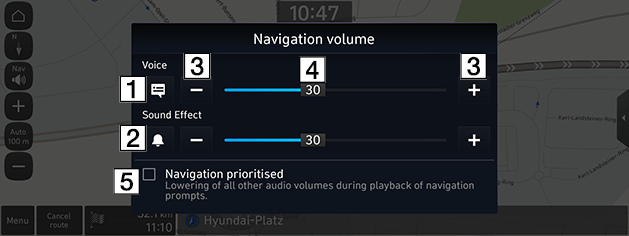
1 [![]() ] [
] [![]() ]
]
Press the button to mute or unmute voice guidance.
2 [![]() ] [
] [![]() ]
]
Press the button to mute or unmute sound effect.
3 [I] [J]
Press the buttons to adjust the volume.
4 [![]() ]
]
Drag the volume control bar to adjust the volume.
5 [Navigation prioritised]
If checked, lowers all other audio volumes during playback of navigation prompts.
Scrolling map
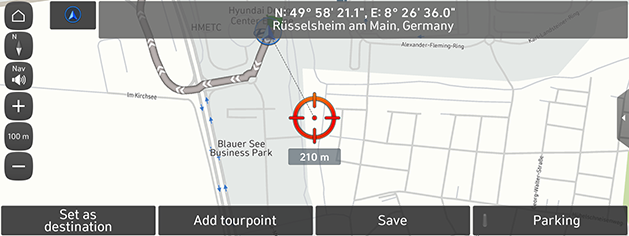
Press and hold the point on the map and move it to the desired direction and release it when the desired point is focused. The selected point will be centred on the screen and then a scroll mark will be displayed. Information about the marked point and straight line distance from the current position will be displayed at the centre of the screen.
|
|
|
,Note |
|
If a map area on the map screen is pressed, the map will continuously scroll in the corresponding direction until it is released. |
Making a call to POI
After searching for a POI, the POI phone number information can be used to make a call to the POI facility.
- Use various search methods, such as the map scroll function, the destination search function and so on. For more details, refer to each search function section.
|
|
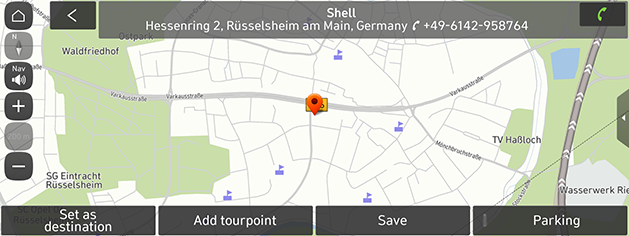
- Press [U] on the map screen.
- Bluetooth phone is used to make the call.
|
,Note |
|
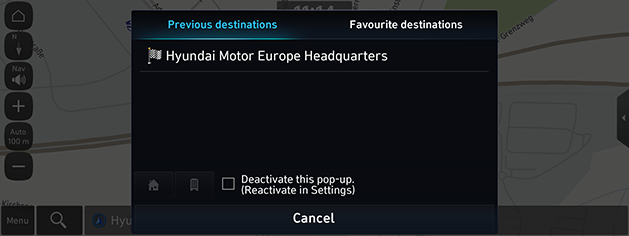
Guidance to previous destinations
When starting the navigation, the “Previous destinations” pop-up appears for about 10 seconds. The pop-up is displayed only when the navigation is started without the route planned.
You can select one from the list.
|
|
|
,Note |
|
Press [ |
Quick menu
You can see the quick menu to move to the navigation menu quickly. Some items in the images may differ from the actual screen, according to the model, option and country.
- Press [Menu] on the map screen.
|
|
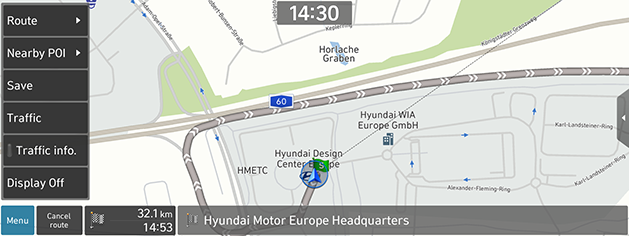
- Press the desired option.
- [Menu]: Shows or hides the quick menu.
- [Route]: Recalculates the route or sets the route options.
- [Nearby POI]: Finds a facility by searching for POI near the current position.
- [Save]: Adds the current position to saved places.
- [Traffic]: The map preview is provided when there is information to display.
- [Traffic info.]: Sets whether to display traffic flow.
- [Display Off] (If equipped): Turns off the screen.