Turning on the radio
You can scan radio channels by using various options. Save your favorite channels to the presets list.
Perform any of the following methods:
- • On the All Menus screen, press Radio.
- • On the control panel, press the button (if equipped).
- When multiple media are connected, press the [] or [] button once more and then press the desired media source from the Radio/Media selection window (if equipped).

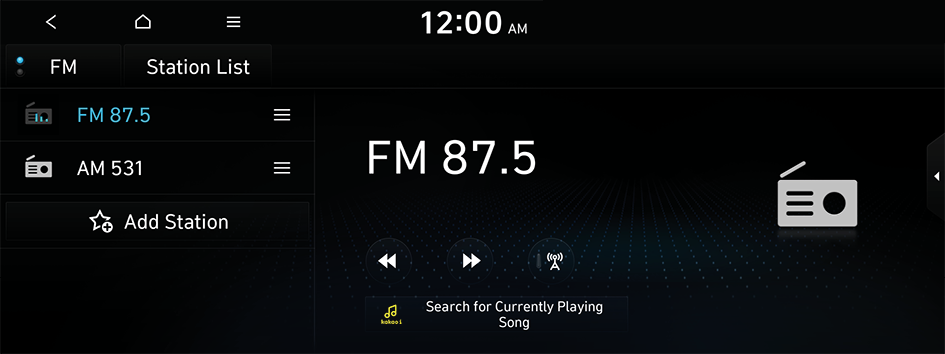
Type1

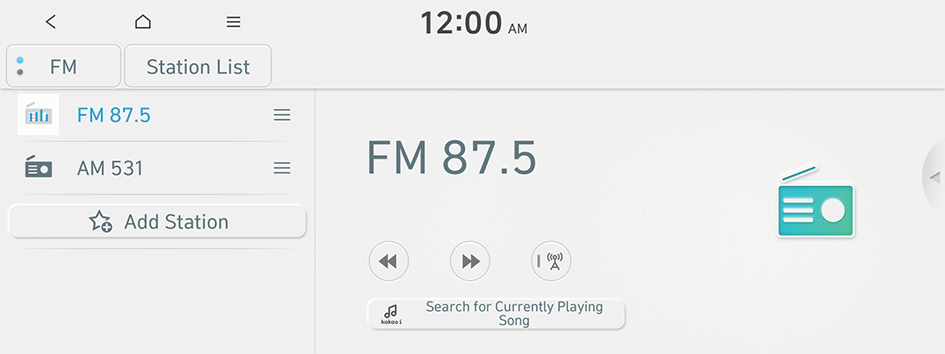
Type2
- The screen may differ depending on the vehicle model and specifications.
- If the vehicle is type 2, it is possible to change the graphic theme to white or black. ▶ See "Graphic Themes (if equipped)."
Radio screen
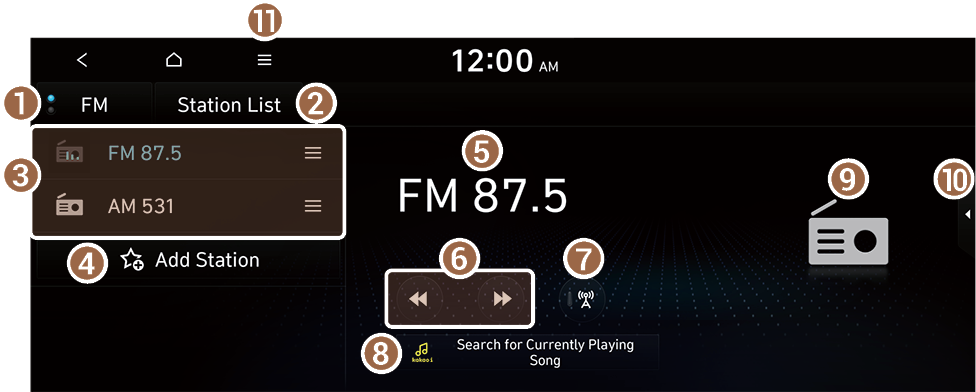
The radio screen provides various functions while listening to radio broadcasts.

- Can change the radio mode.
- Can see the list of available radio stations.
- Presets list
- Press and drag
 next the channel to rearrange the presets list.
- Press and drag
- You can save the current frequency to the presets list. ▶ See "Saving radio channels."
- Radio broadcast information
- Can change the frequency.
- Automatically switches the frequency, depending on the radio wave conditions.
- Use Kakao i to display the detailed information of the music that is now playing on the radio.
- To use the Kakao i service, subscribe to the Bluelink service. ▶ See "Subscribing to the service."
- Shows information on the radio station that is airing the broadcast you are listening to, and shows the album art for the broadcast.
- Can turn on or off the split screen mode.
- The list of menu items appears.
- • Display Off: Turns off the screen. To switch the screen back on, press the screen or briefly press the power button (if equipped).
- • Station List: Can see the list of available radio stations.
- • Scan FM (Available only with FM): Select a broadcast of your choice after listening briefly to broadcasts from different radio stations.
- • Scan AM (Available only with AM): Select a broadcast of your choice after listening briefly to broadcasts from different radio stations.
- • Tune FM Manually (Available only with FM): Tune the radio frequency manually (if equipped).
- • Tune AM Manually (Available only with AM): Tune the radio frequency manually (if equipped).
- • Delete Presets: Can delete a registered channel from the presets list. ▶ See "Deleting a registered channel."
- • Reorder Presets: Rearrange the presets list.
- • Auto. Freq. Switching: Automatically switches the frequency, depending on the radio wave conditions.
- • Kakao i History: Can see recently searched music files through the Kakako i service.
- To use the Kakao i service, subscribe to the Bluelink service. ▶ See "Subscribing to the service."
- • Radio Noise (Available only with FM): You can customize sound quality when listening to radio by adjusting background noise of the original sound.
- • Sound Settings: Displays the system sound settings screen.
- • User's Manual on Web (QR Code): Displays the QR code that provides access to the online user manual for the system.
- • Split Screen: Can turn on or off the split screen mode.
- The screen may differ depending on the vehicle model and specifications.
- The sound effect settings button may appear on the screen depending on the amp specifications. ▶ See "Adjusting the sound effect (if equipped)."
- The broadcast station names and local information are displayed using GPS data. Those information may not appear when there is no GPS data received.
- The displayed broadcast station names may not match the actual ones.
Changing the radio mode
Perform any of the following methods:
- • On the Radio screen, press Radio Mode button repeatedly.
- • On the control panel, press the button repeatedly (if equipped).
The radio mode changes in the order of FM ▶ AM.
Changing the radio channel
Perform any of the following methods:
- • On the Radio screen, press the desired channel from the presets list.
- You can also change the channel by using the Move lever/button on the steering wheel.
- • On the control panel, press the
 or
or  button. You can move to the previous or next channel with good reception (if equipped).
You can listen to the changed radio broadcast.
- If any Search lever/knob on the control panel, you can also change the frequency by using the lever/knob.
Using the scan function
You can listen to each broadcast briefly and select a desired one.
- At the upper left of the Radio screen, press
 ▶ Scan FM/Scan AM.
Only the channels with good reception can be listened for 5 seconds in turn.
- When you find the desired broadcast, press the radio screen.
You can continue listening to the scanned channel.
Saving radio channels
You can save a specific radio station's channel and easily access the channel.
While listening to a broadcast, press Add Station on the screen.
The current channel is added to the presets list.
- Alternatively, on the Radio screen, press Station List and press
 of the channel you want to save. The channel is saved to the preset list.
 - You can register up to 40 channels.
Editing the radio channel list
Deleting a registered channel
- At the upper left of the Radio screen, press
 ▶ Delete Presets.
 - Select the channel to delete and press Delete ▶ Yes.
The channel is deleted and the preset list is emptied.
Rearranging the list of saved channels
- At the upper left of the Radio screen, press
 ▶ Reorder Presets.
 - Press and drag
 next the channel to rearrange to the desired position.
The presets list is rearranged.


