Searching for destination
Address search
You can find the destination by searching for an address.
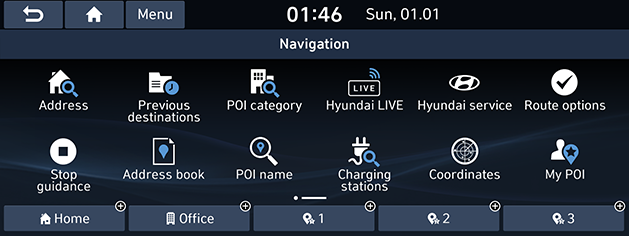
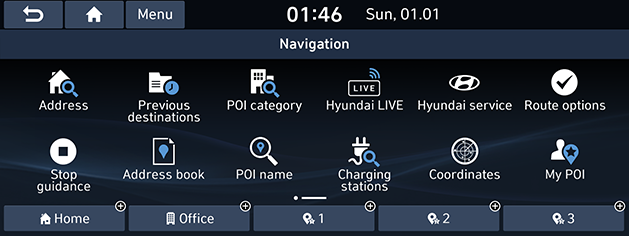
- Press [NAV] > [Address].
|
|
|
|
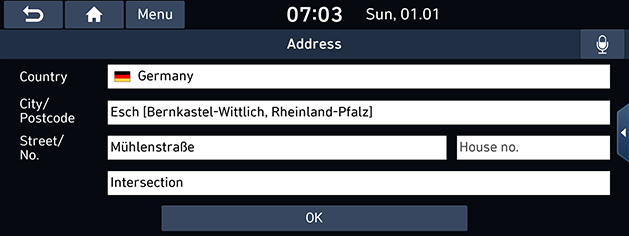
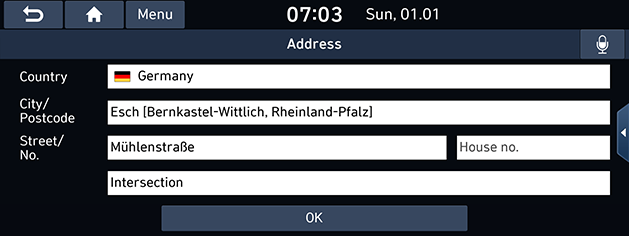
- Enter the name of the Country, City/Postcode, Street/No., House number or Intersection corresponding to the desired destination, then press [OK].
|
|
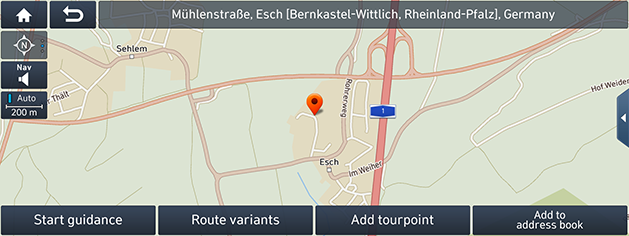
- Press [Start guidance].
- If you want to select multi routes, press [Route variants].
- If you want to add a tourpoint when a route has been set, press [Add tourpoint]. For more details, refer to “Adding tourpoints” part.
- If you want to add the position to [Address book] menu, press [Add to address book]. For more details, refer to “Adding the position to address book” part.
|
,Note |
|
The destination is saved in the [Previous destinations] menu automatically. (Refer to “Previous destinations” part.) |
POI category
You can set a POI as destination using different search methods.
- Press [NAV] > [POI category] or [NAV] > [POI name].
|
|
- Press one of the search methods.
- [POI category]: Finds POI by the category of the facility. (Refer to “Searching for POI by [POI category]” part.)
- [POI name]: Finds POI by the name of the facility. (Refer to “Searching for POI by [POI name]” part.)
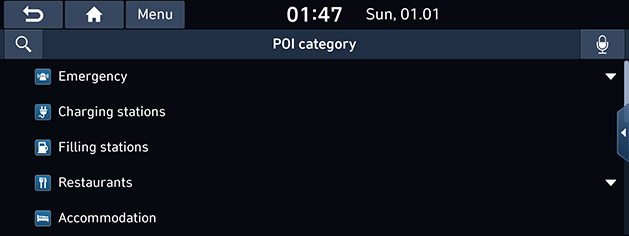
Searching for POI by [POI category]
- Press [NAV] > [POI category].
|
|
- Select one of the categories.
- Press [
 ] to find a category through search. Then input its name and select [OK].
- Select one of the subcategories.
- Press the preferred POI.
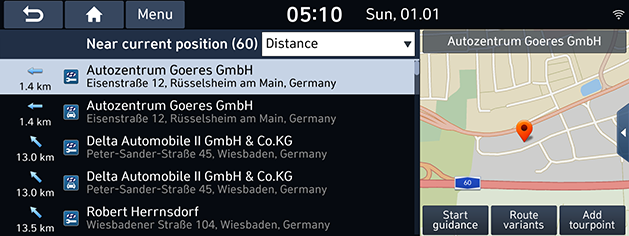
- The list of items is displayed.
- Press [Distance], [Name] or [Category] to arrange the list in distance, name or category order.
- Press the desired postion.
- [Along route]: Searches for POI’s along route when a route is set.
- [Near current position]: Searches for POI’s around the current position.
- [Near destination]: Searches for POI’s around the destination when a route is set
- [Near scroll mark]: Searches for POI’s around the current cursor when the map scrolled.
- [Near city centre]: Searches for POI’s around the selected city centre.
- Press [Start guidance].
- If you want to select multi routes, press [Route variants].
- If you want to add a tourpoint when a route has been set, press [Add tourpoint]. For more details, refer to “Adding tourpoints” part.
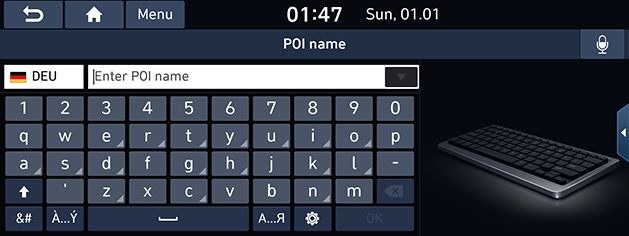
Searching for POI by [POI name]
- Press [NAV] >[POI name].
- Select the preferred country.
|
|
- Input the desired facility name and press [OK].
- The list of items is displayed.
- Press [Distance], [Name] or [Category] to arrange the list in distance, name or category order.
- Press [All cities] or [All categories] to select the desired city or category.
- Follow step 7 of the “Searching for POI by [POI category]” part.
Hyundai service
You can set the facilities of Hyundai service as destination.
|
,Note |
|
If the live service is connected, the Hyundai service information can be searched from server. |
You can obtain search results near your current position.
- Press [NAV] > [Hyundai service] > [Near current position].
|
|
- Press [Distance], [Name] or [Category] to arrange the list in distance, name or category order.
- Press the preferred item from the list.
- Follow step 7 of the “Searching for POI by [POI category]” part.
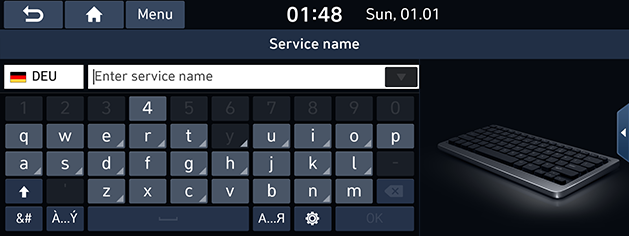
Service Name
You can search for a Hyundai service by entering its name using the keypad.
- Press [NAV] > [Hyundai service] > [Name].
- Select the preferred country.
|
|
- Enter the Hyundai service name and press [OK].
- The list of the items is displayed.
- Press [Distance], [Name] or [Category] to arrange the list in distance, name or category order.
- Press [All cities] or [All categories] to select the desired city or category.
- Follow step 7 of the “Searching for POI by [POI category]” part.
|
,Note |
|
The information for the Hyundai service facilities may not correspond to a result of map information, since the information can be provided up to date. |
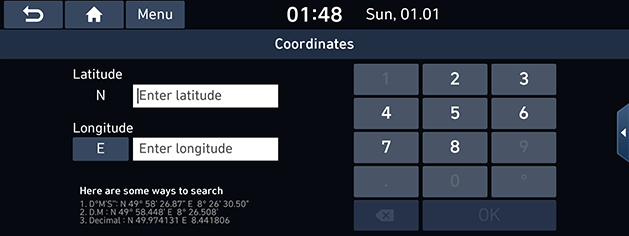
Coordinates
You can find a destination by entering the coordinates of latitude and longitude.
- Press [NAV] > [Coordinates].
|
|
- Enter the coordinates and press [OK].
- Follow step 3 of the “Address search” part.
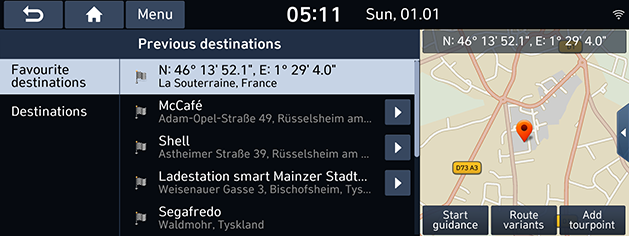
Previous destinations
You can select one of the locations you have previously searched for as a destination, tourpoint and start point.
- Press [NAV] > [Previous destinations].
|
|
- Press [Menu] > [Delete] to delete the previous destinations. Select the desired item, then press [Delete] > [Yes].
- [Mark all]: Marks all items.
- [Unmark all]: Unmarks all items.
- Press the preferred item from the list.
- Follow step 7 of the “Searching for POI by [POI category]” part.
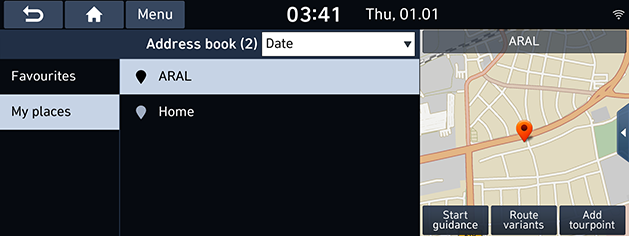
Address book
You can select destination from a location saved in the [Address book] menu. To utilize this function more effectively, destinations that you often travel to should be saved in advance.
First of all, store in the [Address book] menu through the destination search function.
- Press [NAV] > [Address book] > [Favourites] or [My places].
|
|
- Press [Date], [Name] or [Category] to arrange the list in date, name or category order in “My places” menu.
- Press the preferred item from the list.
- Follow step 7 of the “Searching for POI by [POI category]” part.
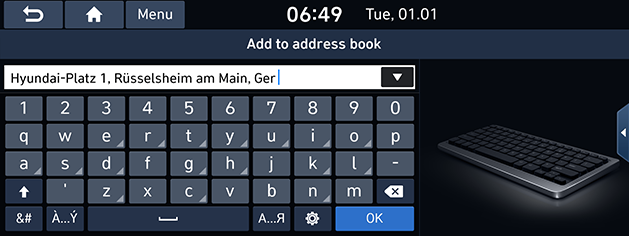
Adding the position to address book
You can add the current position or the selected place to address book.
- To add the current position, press [
 ] > [Add to address book] on the map screen. To add the selected place, press [Add to address book] after searching for a destination or scrolling on map.
|
|
- Input the desired name and press [OK].
Exporting address book to USB
This function is used to export the address book to a USB memory device.
- Connect a USB device to the USB port.
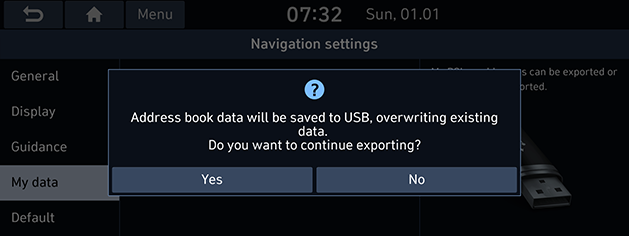
- Press [SETUP] > [Navigation] > [My data] > [Export address book to USB].
|
|
- Press [Yes].
Importing address book from USB
This function is used to import the address book saved in a USB memory device.
- Connect a USB device to the USB port.
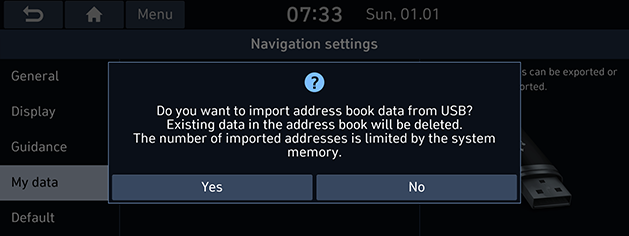
- Press [SETUP] > [Navigation] > [My data] > [Import address book from USB].
|
|
- Press [Yes].
|
|
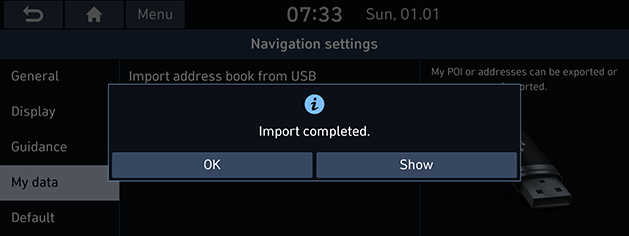
- Press [OK]. Press [Show] to view the imported address book.
|
,Note |
|
Editing address book
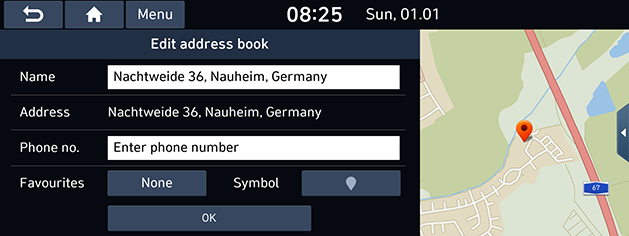
- Press [NAV] > [Address book] > [My places] > [Menu] > [Edit].
- Select the item to edit and press [
 ].
].
|
|
- Edit the desired item.
- [Name]: Changes the name.
- [Phone no.]: Enters the phone number.
- [Favourites]: Saves in the favourite item.
- [Symbol]: Sets the symbol displayed on the map screen.
- Press [OK].
Deleting address book
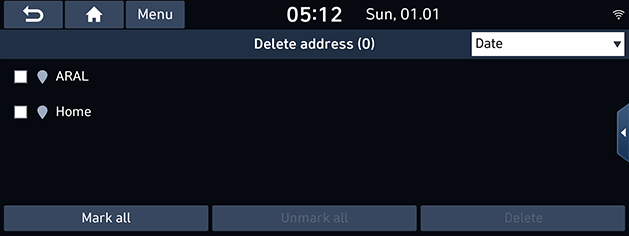
- Press [NAV] > [Address book] > [My places] > [Menu] > [Delete].
|
|
- Select the desired item, then press [Delete] > [Yes].
- [Mark all]: Marks all items.
- [Unmark all]: Unmarks all items.
Planned tours
This function can be used to set a route with several tour points.
You can find the destination to a location saved in the [Planned tours] menu. To utilize this function more effectively, destinations that you often travel to should be saved in advance.
First of all, save in the [Planned tours] menu through route search function. For details, refer to “Saving the plan tour to the [Planned tours] menu” part.
Searching for tour
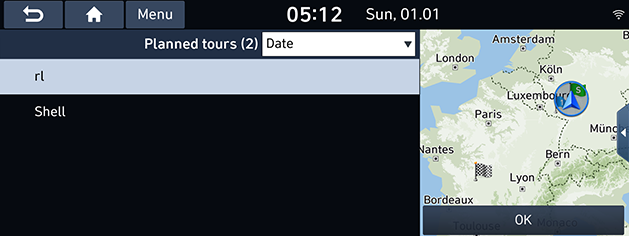
- Press [NAV] > [Planned tours].
|
|
- Press [Date] or [Name] to arrange the list in date or name order.
- Select the desired item.
- Press [OK] > [OK] > [Start guidance].
Deleting the tour
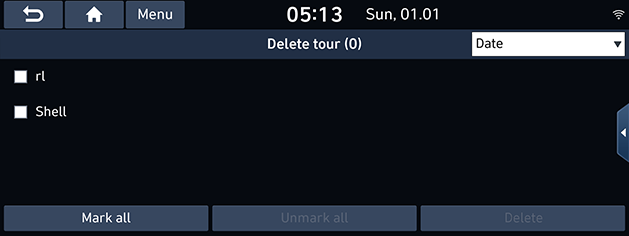
- Press [NAV] > [Planned tours] > [Menu] > [Delete].
|
|
- Select the desired item, then press [Delete] > [Yes].
- Press [Date] or [Name] to arrange the list in date or name order.
- [Mark all]: Marks all items.
- [Unmark all]: Unmarks all items.
My POI
This function is used to import personal POI data including the map information (position, name...) saved in USB memory device. Afterwards the data can be selected as destination through the POI menu.
|
,Note |
|
Supported POI group formats: “.kml”/ “.gpx”. |
Importing the POI data
- Store the POI file including map information (position, name...) from web map in USB memory device.
- Connect the USB device to the USB port.
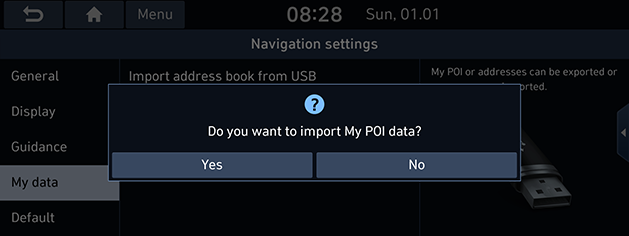
- Press [SETUP] > [Navigation] > [My data] > [Import My POI from USB].
|
|
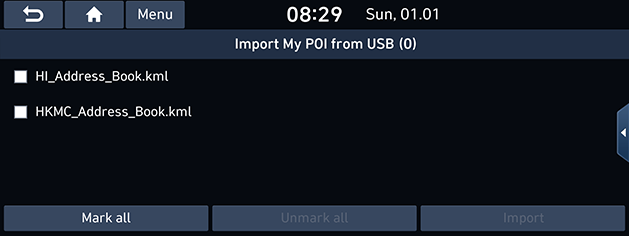
- Press [Yes]. The list of POI groups is displayed.
|
|
- Select the desired POI file.
- Press [Mark all] to select all POI groups.
- Press [Unmark all] to unmark all POI groups.
- Press [Import]. The POI groups is imported.
|
|
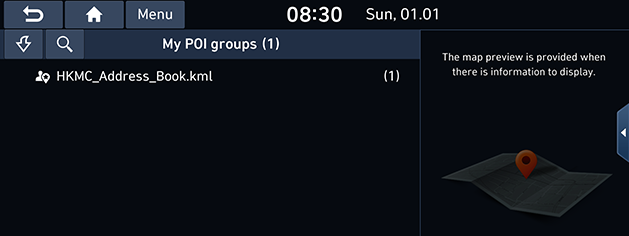
- Press [OK]. Press [Show] to view the imported POI groups.
|
,Note |
|
Finding a destination by My POI
- Press [NAV] > [My POI].
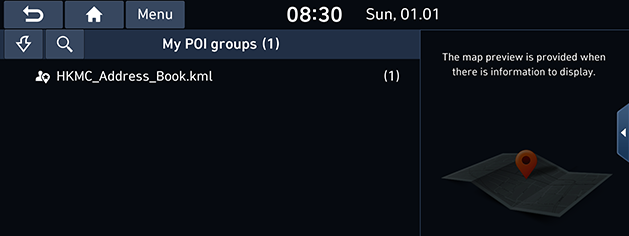
- Select the POI group. The list of POI is displayed.
|
|
- Press the preferred item from the list.
- Follow step 7 of the “Searching for POI by [POI category]” part.
|
,Note |
|
The destination is saved in the [Previous destinations] menu automatically. (Refer to “Previous destinations” part.) |
Deleting POI data (or group)
- Press [NAV] > [My POI] (or press a POI file).
- Press [Menu] > [Delete].
- Select the desired item, then press [Delete] > [Yes].
- [Mark all]: Marks all items.
- [Unmark all]: Unmarks all items.
Changing POI data (or group) name
- Press [NAV] > [My POI] (or press a POI file).
- Press [Menu] > [Edit].
- Press one of the POI data (or file).
- Enter new tour name and select [OK].
Charging stations (EV vehicles only)
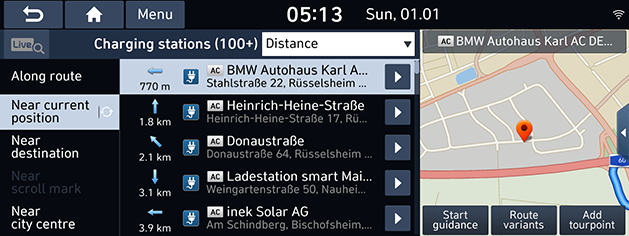
- Press [NAV] > [Charging stations].
|
|
- Press [Distance], [Name] or [Category] to arrange the list in distance, name or category order.
- Press [
 ] to move to the [Live charging stations] menu. For details, refer to "Live charging stations (Live filling station)" part.
- Press the preferred item from the list.
- Follow step 7 of the “Searching for POI by [POI category]” part.
Home/Office/1~3 (Favourites)
If your home location, office location and favourite locations are already in the [Navigation] menu, they can be easily retrieved by tapping on them.
First of all, store home, office or 1~3 (Favourites) in the [Navigation] menu through the destination search function.
Registering Home, Office or 1~3 (Favourites)
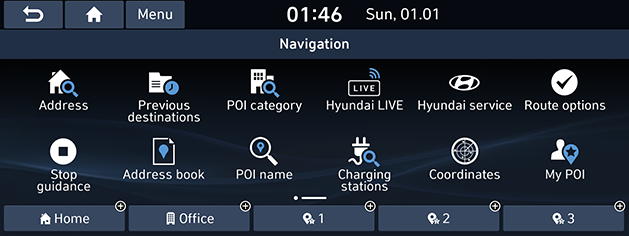
- Press [NAV].
|
|
- Press [Home], [Office] or [1~3 (Favourites)].
- Select the desired position through the destination search function.
- Press [OK] when the destination search is completed.
|
|
- Input the desired name and press [OK]. It is saved in the [Home], [Office] or [1~3 (Favourites)] menu automatically.
Finding your Home, Office or 1~3 (Favourites)
- Press [NAV] > [Home], [Office], or [1~3 (Favourites)].
- Press [Start guidance].
